. Following this tutorial you will run your IoT device without to write one line of code. However, if you are an expert developer, please, consider that the Miniservice framework is a complete framework so you can use it also directly from your professional applications (using the API SDK) and to build your own firmware for your own IoT boards.
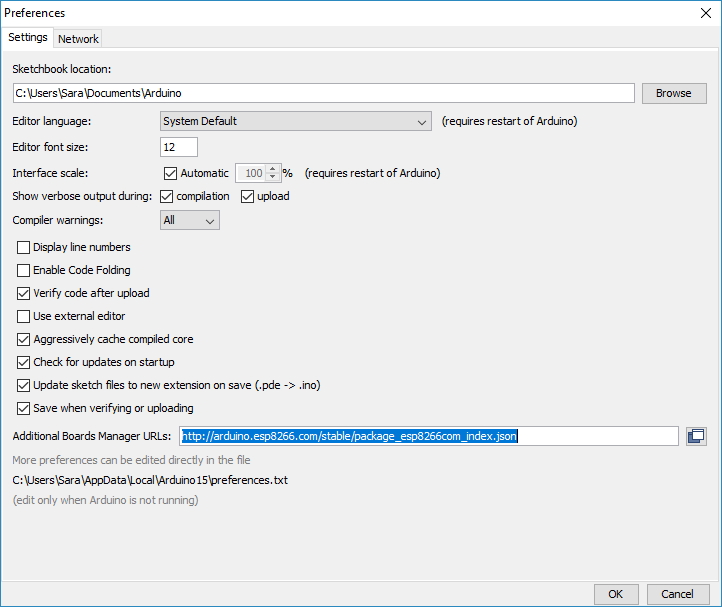
Before to upload the firmware you must be sure to have the Arduino development environment downloaded and installed in your pc. To download the latest version of the development environment you can go directly to the Arduino Web Site Once the basic development environment is properly installed you will need to add the support for the NodeMCU ESP8266 board (This board can be, in fact, easily programmed using the Arduino development environment). To add it open the Arduino dev environment and: 1) Open the preferences window from the Arduino IDE. Go to File > Preferences 2) Enter the text string http://arduino.esp8266.com/stable/package_esp8266com_index.json into the “Additional Board Manager URLs” text box as shown in the figure below. Then, click the “OK” button.
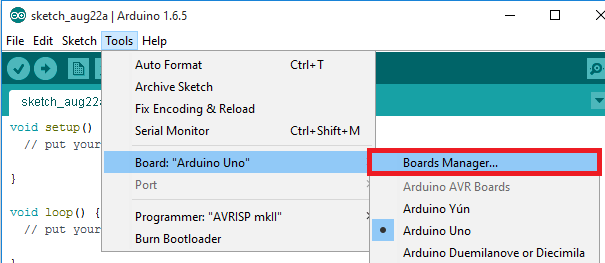
3) Open the boards manager. Go to Tools > Board > Boards Manager…
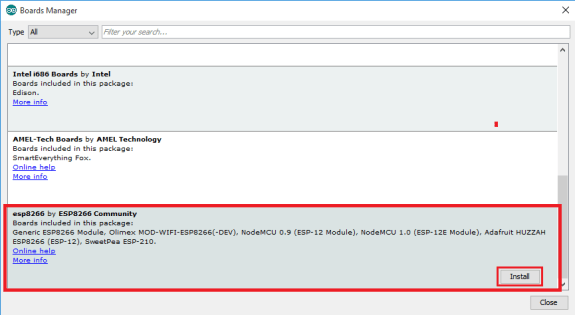
4) Scroll down and select the ESP8266 board menu. Install “esp8266”.
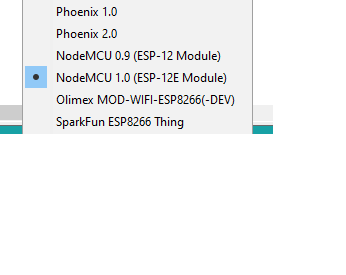
Now your device board list is updated you can select in the board menu of the arduino ide the NodeMCU board you bought.
Now that you have the dev environment installed we need to search for the location of a file named: "esptool.exe". This file is the file you need to load the bin file containing the firmware.
Use the search function of your windows OS to find this file. Usually it is in the AppData folder related to your Arduino development environment installation. For example, in my case it is in:
C:\Users\MyuserName\AppData\Local\Arduino15\packages\esp8266\tools\esptool\0.4.13/esptool.exe
Once you will have found it you will be able to download the latest version of the firmware that you will find in our Download PageDownload it and save in a folder of your pc. Connect the nodeMCU board using an USB cable to your computer and identify the serial port it connects to. In order to do this you have different options. My preferred one is to open the Arduino Development environment and select the COM port menu (Tools --> COM Ports)

In my case the COM3 is the only option I have so the NODEMCU board will be surelly connected on that port
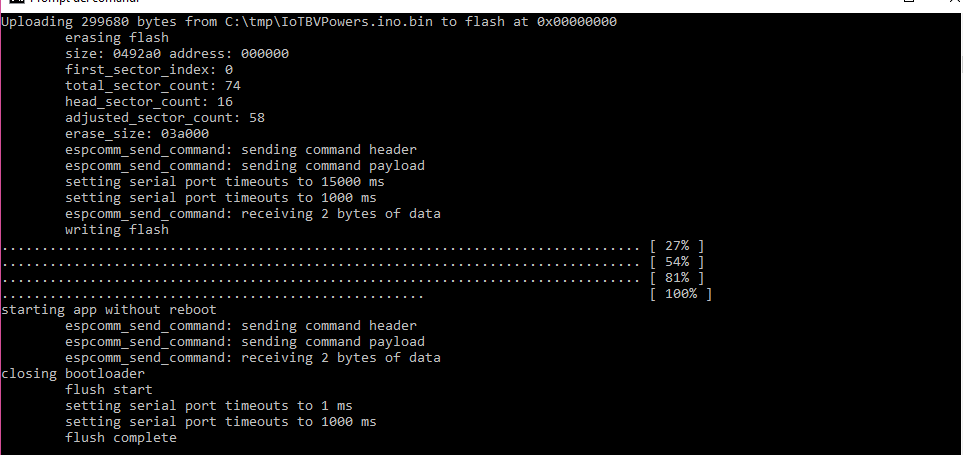
Now that you have all the required information open a shell (type 'cmd' and hit enter in the text area at the bottom of the windows start menu) and write the following shell command:
C:\{path of the esptool}\esptool.exe -vv -cd nodemcu -cb 115200 -cp {Com port you found} -ca 0x0 -cz 0x400000 -ca 0x00000 -cf C:\{pathfor the firmware}\IoTBVPowers.ino.bin
Now that the firmware has been updated, you can connect your new device to the 220V/110V power plug and, really, start your first IoT device session.
Once the device is started, it opens the EPROM included into the NodeMCU board and try to read a valid SSid and a valid password to access the internet. If this is not possible then it will immediatelly restart itself in APN mode.
When in APN mode the device put the firmware in configuration status and allows you to access it as a separate wifi network where itself is the accesspoint to serch in the wifi network
To connect to your device you can use any computer or tablet or mobile phone. Open the wifi APN search function in your laptop and search for the APN named:
MiniserviceWebAPN
Connect with it using this name as ssid and MiniserviceWebAPN as password.
Once the connection is estabilished you will be able to open your browser and search for the following web site 192.168.4.1 (write this IP address in the url text box of your browser). You will receive the following web page:
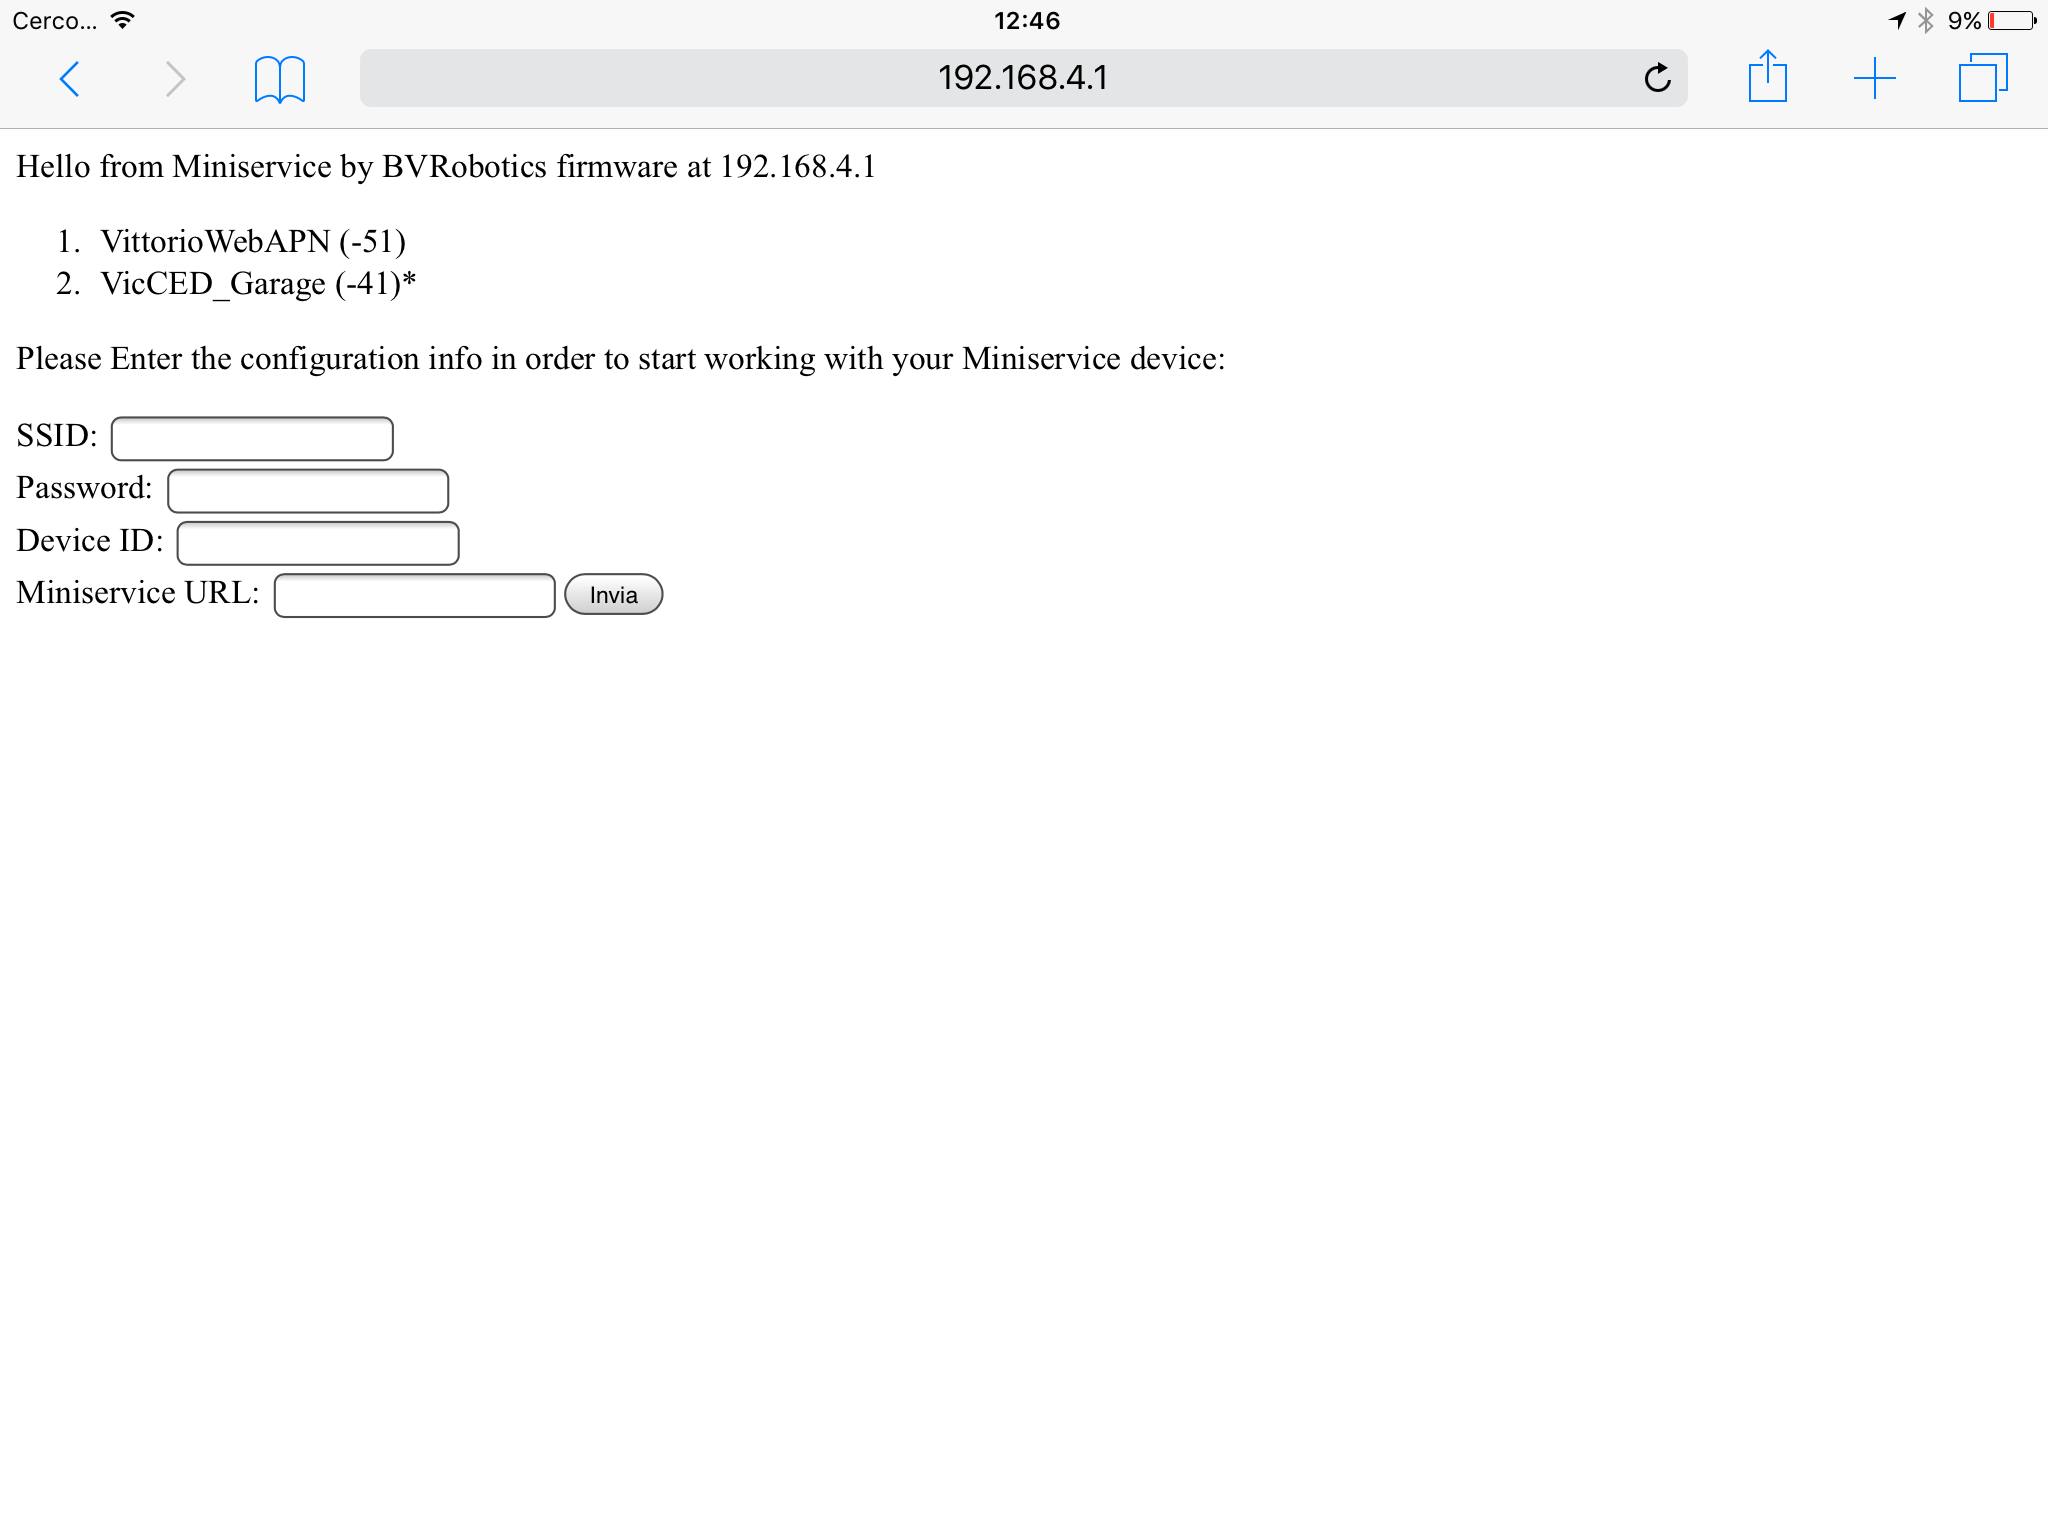
As you can see, in this pictures it lists all APNs currently available in the range of your IoT device. If you know credentials for one of these APNs enter the right information in the first 2 text boxes (please note that names and passwords are case sensitive).
The 3rd text box named "Device ID" contains the device code you received from the Miniservice platform when you added your device to the infrastructure. If you have not yet added your device you can follow the tutorial
To add a device you need obviously to be registered into the Miniservice platform. If you have not yet performed any registration you can follow these simple instructions
When you have the device ID value available, enter this value into the text box named "Device ID".
The remaining box named: "Miniservices URL" indicates to the firmware the API endpoint to use. The current value to use is:
https://www.buonevacanze.org
Do not add any slash (/) or backslash (\) and the end of the url.Once you've finished you can push the button named "Send". The system reset itself but doesn't restart. To restart the system disconnect and reconnect the main power plug (The male one. The one connected to your home electricity plug). The device will now restart using the parameters you entered into the Eprom.
If the parameters you entered are correct, the system will start working properly and you will no longer see the APN available in the APNs list in your area. If the device finds an error, (wrong password or wrong endpoint or device not authorised) then the system will return in APN mode and you will see (again) the APN ssid available in the APNs list in your area.
When the system starts properly, you have available a web server who shows statistics and values of your "plug" variables. This web server could be reached using the IP assigned by the network to the device. In order to find this device you need to have access to your wifi router and display the client list available on your lan.
If this is not possible, in a future version of the firmware, we will make available also the ip as output of the nodeMCU I2C bus. This will allow a display to be placed to the IoT box to show the lan IP received during the access process.
If you have this IP, open a browser from a pc connected to your network and enter this ip in the url text box of your browser. You will see a page like this:
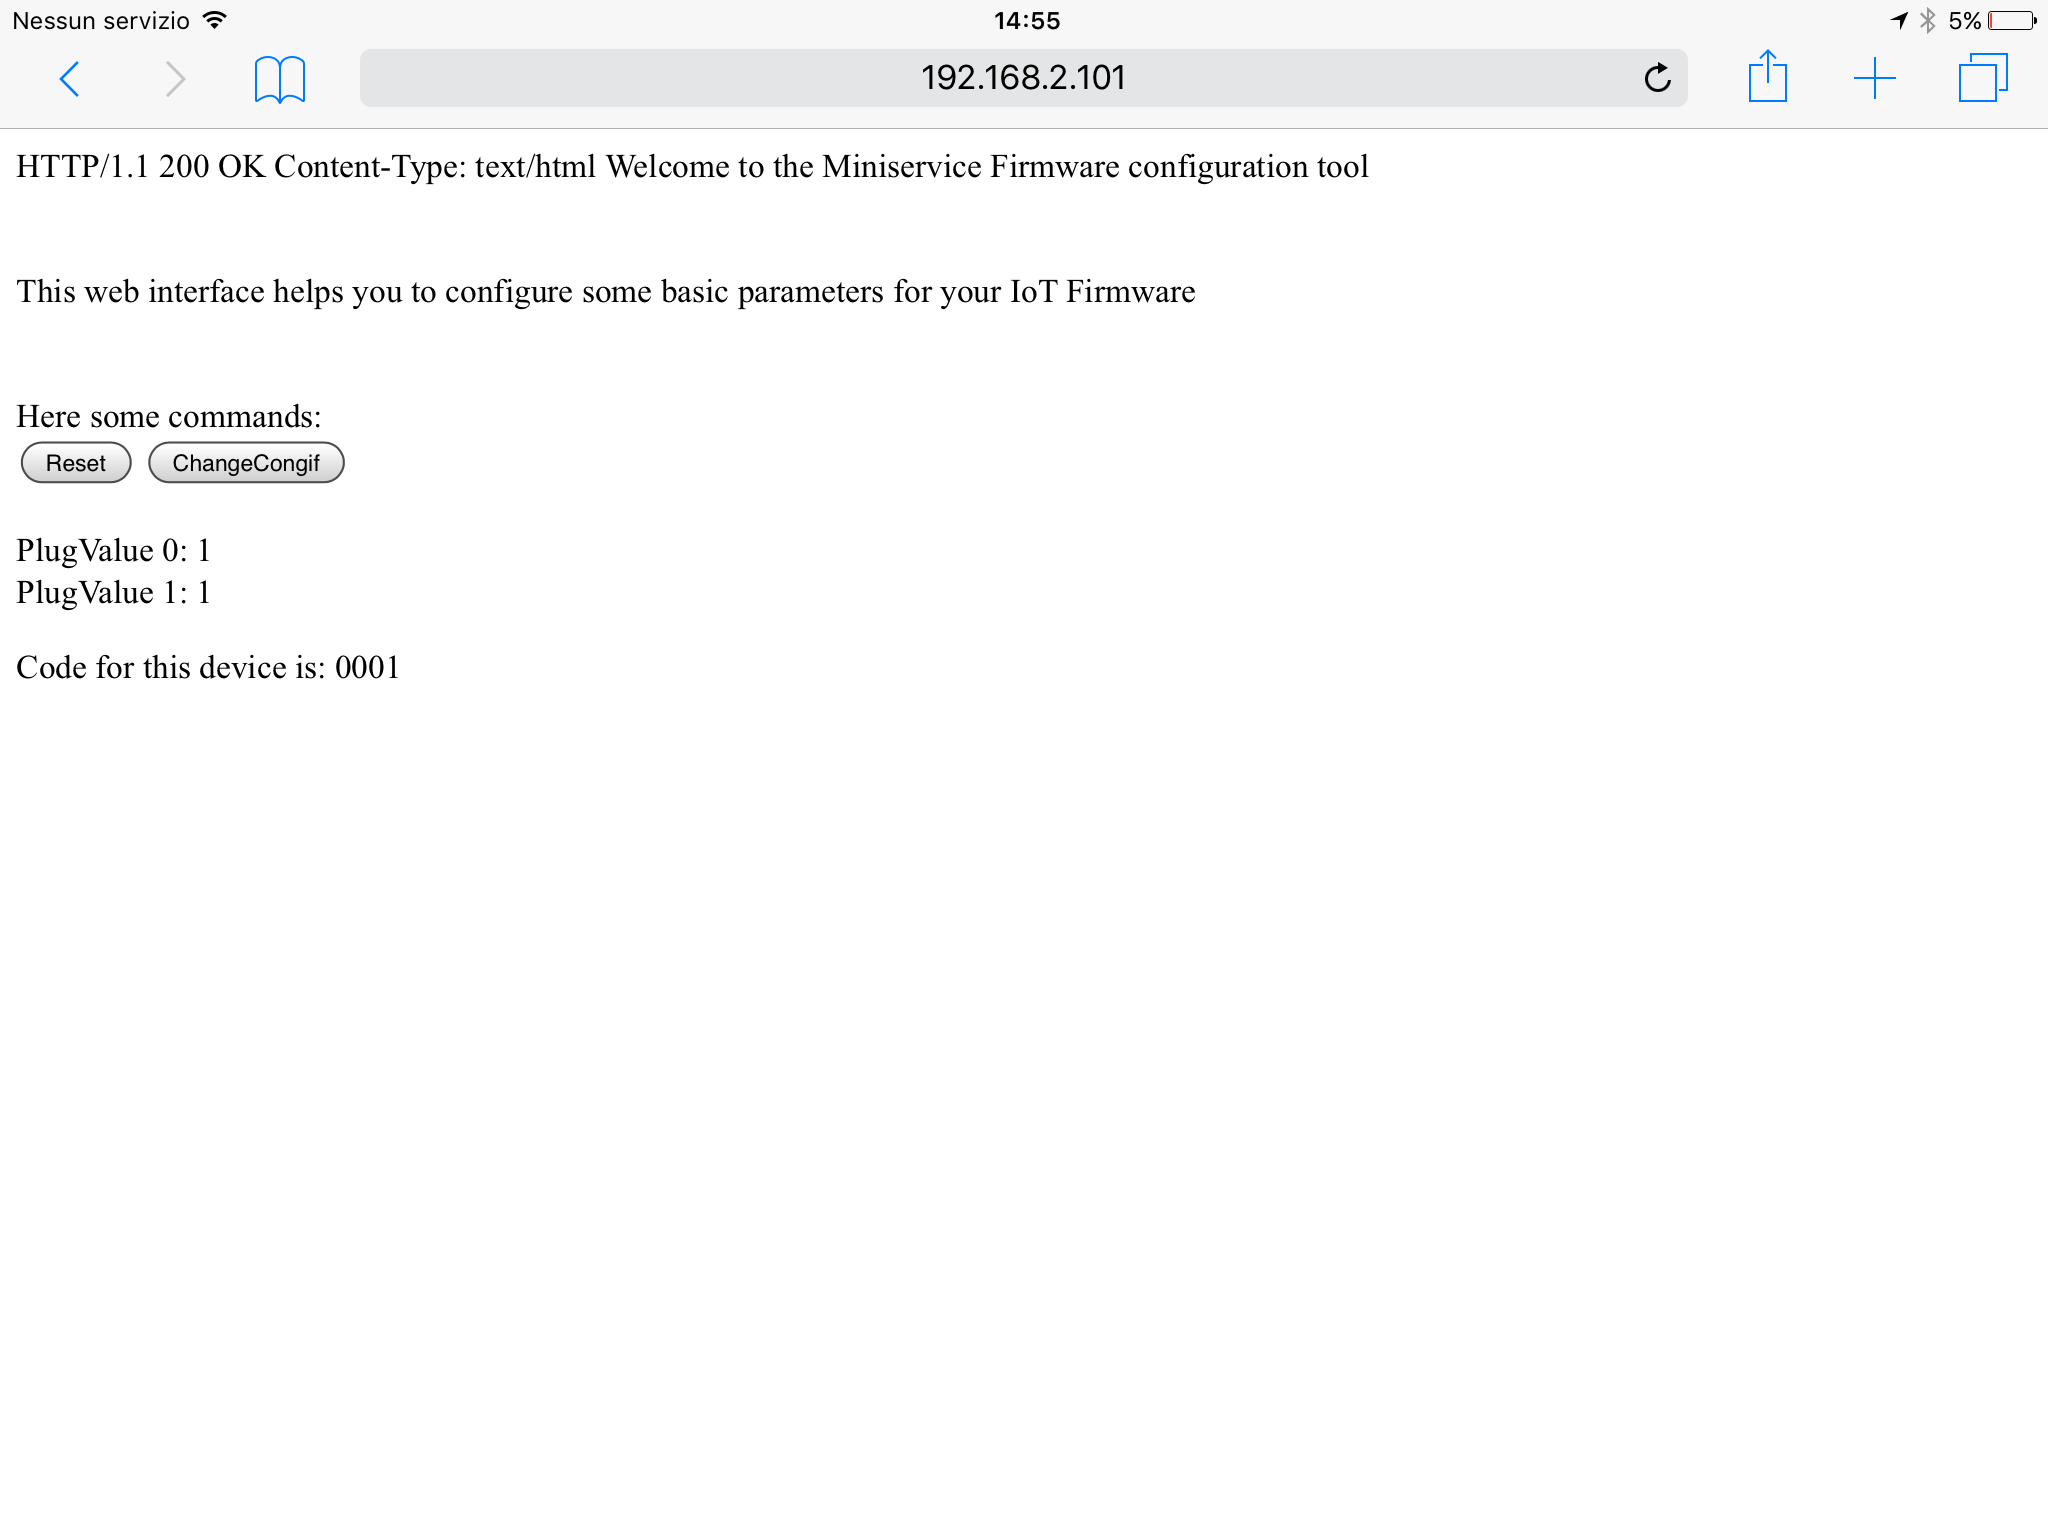
In this page you will be able to see your device ID, the status of your plugs and will be able to reset and change the configuration of your IoT device.
Your first IoT device is, now, up and running. You have ended your configuration and could now access the device using the BVIoTManager Web App or using the Miniservices SDK. In the following video you will be able to see how simple will be to controll your plugs using the Web application.