One popular source of renewable energy is solar power, which harnesses the energy of the sun to produce electricity.
In this article, I will describe how I built an 800W solar power system using microinverters and an automated load management program.
The first step in building a solar power system is to determine the energy needs of your household. In my case, I calculated that I needed an 800W system to power all of my household appliances and electronics. I then researched the different types of solar panels and inverters available on the market and settled on microinverters, which are small inverters that are installed on each individual panel.
Microinverters are more efficient than traditional string inverters because they allow each panel to operate at its maximum power output, even if other panels are shaded or not operating at full capacity.
Once I had selected my microinverters, I ordered the necessary components and began the installation process.
I installed the solar panels on the roof of my house, positioning them to face south (more than possible) for maximum exposure to the sun. I then connected the microinverters to the panels and ran the wiring down to my house.
Installing solar panels on a tiled roof can be a bit tricky. those are the steps involved in mounting solar panels on a tiled roof:
1. Assess the roof structure
Before installing solar panels on a tiled roof, it is important to assess the roof structure. The roof should be strong enough to support the weight of the solar panels and their mounting system. It is recommended to consult with a professional roofer or solar panel installer to ensure that the roof is suitable for solar panel installation.... Don't do like I did!!!
2. Choose the mounting system
There are different types of mounting systems available for solar panels, including ballasted, rail-mounted, and tile hooks. For a tiled roof, tile hooks are the most commonly used mounting system. Tile hooks are designed to attach to the roof tiles and provide a secure and stable base for the solar panels.
3. Mark the location of the solar panel mounts
Once you have chosen the mounting system, you need to mark the location of the solar panel mounts on the roof tiles.
This can be done by measuring the distance between the tiles and marking the position of the mount accordingly. It is important to ensure that the mounts are evenly spaced and aligned.
4. Install the tile hooks
Once you have marked the location of the solar panel mounts, you can begin installing the tile hooks.
The tile hooks are attached to the roof tiles using screws and bolts. It is important to ensure that the tile hooks are securely fastened to the roof tiles.
5. Install the rails
Once the tile hooks are in place, you can install the rails. The rails are attached to the tile hooks and provide a secure base for the solar panels. It is important to ensure that the rails are level and aligned.
6. Install the solar panels
Once the rails are in place, you can install the solar panels.
The solar panels are attached to the rails using mounting brackets. It is important to ensure that the solar panels are securely fastened to the mounting brackets and that they are aligned properly.
The next step was to install the automated load management program.
This program allows me to monitor the energy usage of my household appliances and electronics and automatically adjust their power consumption to maximize the use of the solar power system.
For example, the program can turn off non-essential appliances during peak usage times to ensure that the most important appliances are always powered by the solar system.
It is time now to describe the energy storage system I built into a separate place (connected to the same energy meter).
The first step in building a solar energy storage system is to determine the energy needs of your household. In my case, I calculated that it wasd enough for me to have a 2400W system to power all of my household appliances and electronics during the night standby.
I then researched the different types of batteries available on the market and settled on AGM batteries, which are sealed lead-acid batteries that are maintenance-free and provide high discharge rates.
I had selected my batteries, I ordered the necessary components and began the installation process.
I connected the AGM batteries in series to form multiple 48V strings, which allowed me to increase the total storage capacity of the system. I then connected the battery strings to a battery charger, which was connected to the mains power supply.
The battery charger is used to charge the batteries during periods of low solar energy production, such as at night or on cloudy days.
The charger is set to maintain the batteries at a specific voltage and prevent overcharging or undercharging.
Once the batteries are fully charged, the excess energy produced by the solar panels can be stored in the batteries for later use.
To use the stored energy, I installed an inverter that converts the DC power stored in the batteries to AC power that can be used by my household appliances and electronics. The inverter is connected to the battery strings and to the main electrical panel of my house, which allows me to use the stored energy whenever it is needed.
Overall, building an 800W solar power system with microinverters and an automated load management program was a challenging but rewarding project. Not only am I now able to power my household with clean, renewable energy, but I am also saving money on my energy bills and reducing my carbon footprint. I encourage others to explore the possibilities of renewable energy and consider building their own solar power systems.
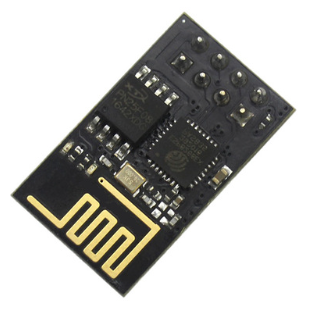
The Miniservices by BVRobotics infrastructure makes you available a basic firmware and all the needed instructions to install it on this board. Using this pre-configured firmware you will no need to write one line of code to interface your sensors directly with the Miniservice platform and will be able to run your device from internet for free thanks to the BVIotManager application. To retrieve the right temperature, the sensor I used is a DHT11, but you can use also a DHT22 (more detailed) or any other sensor. To download this library you can use our Download area
If you want to build a more complex firmware on your own and use, in any case, the Miniservice infrastructure you need, in any case, to use the right libraries. Your code will need to include the following headers:
                #include "ESP8266WebServer.h"
                #include "ESP8266WiFi.h"
                #include "dht11.h"
                #include "ESP8266HTTPClient.h"
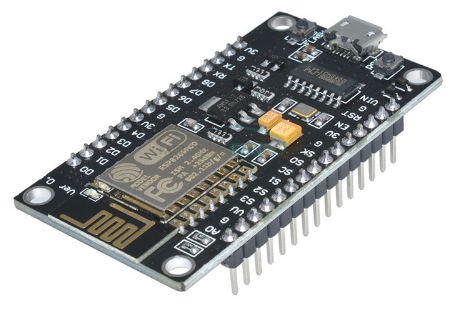
The algorithm is very easy and uses the EPROM chipset installed on the board to store configuration data.
        Start and retrieve the APN information stored into the EPROM of the NodeMCU
        Try to connect to the APN
        IF YES then activate the white led and start sending information every five minutes to the  Miniservice temperature service
            Activate a web server and if requested display the same temperature you read
        IF NO then activate the RED led and start your APN (became an access point)
            Open a web server and wait for a connection
            Once a connection has been estabilished then ask for a new APN and a new password and store these info into the eprom
            reset the board and start from scratch
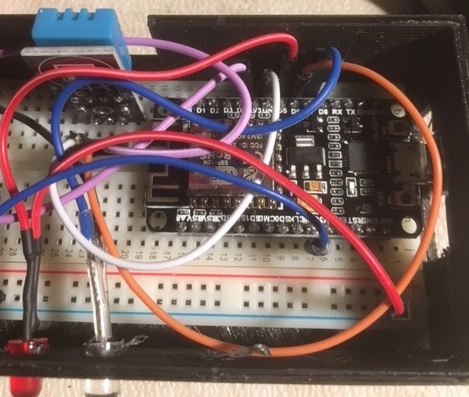 The IoT device fits perfectly in a case I draw and printed with my printerina 3D printer. If you want you can download the STL files from our Download area
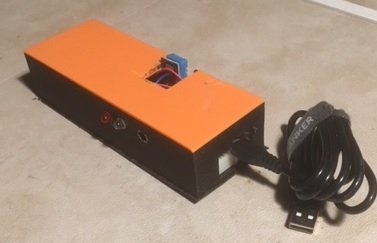 This is a function I built in order to test if the wifi connection, using the settings stored in the EPROM, has been successufully performed:
        bool testWifi(void) {
            int c = 0;
            WiFi.begin(esid.c_str(), epass.c_str());

            Serial.println("Waiting for Wifi to connect");
            while ( c < 20 ) {
                if (WiFi.status() == WL_CONNECTED) { return true; }
                delay(500);
                Serial.print(WiFi.status());
                c++;
            }
            Serial.println("");
            Serial.println("Connect timed out, opening AP");
            return false;
        }
        String BuonevacanzeAuthenticate() {


            String SendString, payload, StrToken;
            HTTPClient http;
            SendString = "http://www.buonevacanze.org/approver/default.aspx?PCC=" + ObjectCode + "&&APP=" + SVCTemperature + "&&TAG=0&&LANIP=" + WiFi.localIP().toString();
            Serial.println("Sending = "+ SendString);

            //Send Data to Buonevacanze
            http.begin(SendString);  //Specify request destination

            int httpCode = http.GET();                                                                  //Send the request

            if (httpCode > 0) { //Check the returning code

                payload = http.getString();   //Get the request response payload
                StrToken = xmlTakeParam(payload,"Message");
                Serial.println("HashCode: " + StrToken);
            }
            else
                payload = "Not Authorized";

            http.end();   //Close connection
            return payload;
        }
            dht11 DHT;


            TempValue = DHT.read(DHT_PIN);

            SendMeteoValues(Token,DHT.temperature,DHT.humidity);
            void SendMeteoValues(String Token,int Temp,int Hum)
            {

                String SendString, payload, StrToken;
                HTTPClient http;
                SendString = "http://www.buonevacanze.org/approver/temperature.aspx?TOKEN=" + Token + "&&TEMP=" + String(Temp) + "&&HUM=" + String(Hum) + "&&GEO=0";
                Serial.println("Sending = "+ SendString);

                //Send Data to Buonevacanze
                http.begin(SendString);     //Specify request destination
                int httpCode = http.GET();
                if (httpCode > 0) {         //Check the returning code

                payload = http.getString();   //Get the request response payload
                StrToken = xmlTakeParam(payload,"ReturnMessage");
                Serial.println("Result: " + StrToken);

                }
                http.end();   //Close connection

            }
Another interesting functionality (not implemented for this occasion but available as service function), is the one to store a gps position linked to the temperature sent to the infrastructure. In this way you will be able to associate a position to a specific temperature.